| Par | 3 | Distance | 85.9m | 282ft |
- LJ Little Juan
- Swa Swallows
- TCA Tin Can Alley
- HP Hard Par
- Hmp The Hump
- HB Humpback
- Smk Church Wood
- Crw Crow’s Nest
- Lst Safari 1 – Lost Sole
- Oak Over The Oak
- DPD Deer Park Drop
- P5 The Par 5
- HR High Riser
- $2 Safari 2
- Pnd The Pond
- WS Whale Sac
- MP Muster Point
- DC Druid City
- JJ Johnson’s Joker
- Ice Ice House
- UD The Upside Down
- Mac Big Macadamia
- Byl Whale Sac
- BJ Big Juan
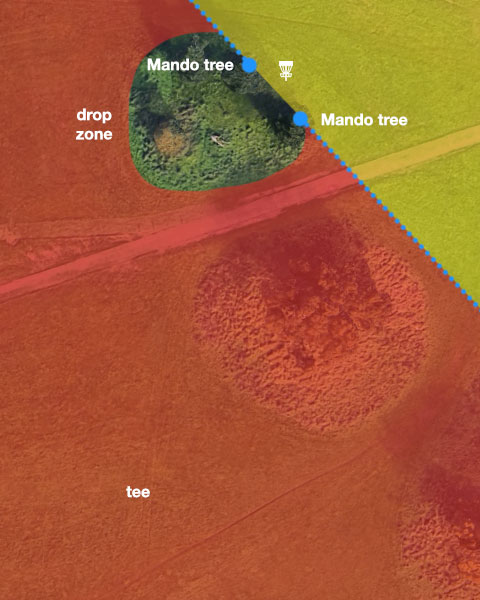
Island hole – everything outside the island is OB.
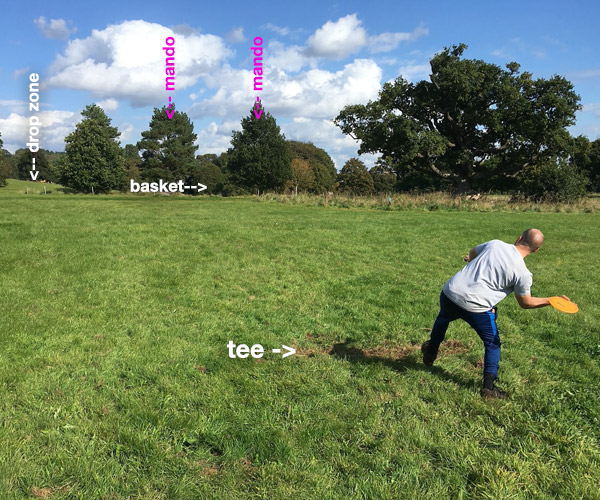
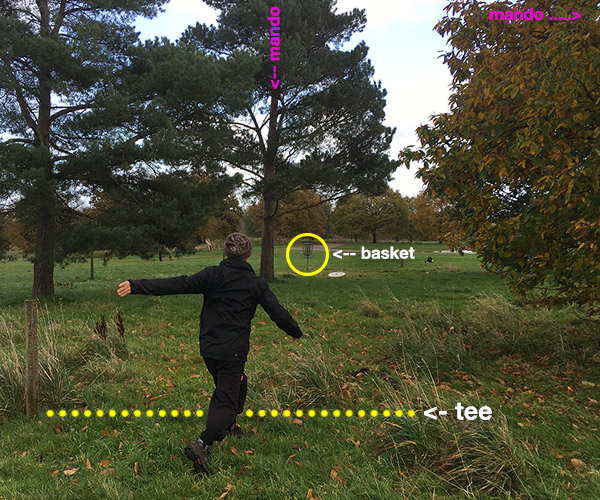
To reach the basket, you have to pass between the two ‘Mando trees’. Once you pass through the mandos, the yellow area is no longer OB.
From the tee, if you fail to land on the island, or you pass the mandos incorrectly, you must proceed to the drop zone (+ 1 penalty stroke), even if you land on the island but roll OB, or pass over the island.
If (from the tee) you pass through the double mando, you’re all good, even if you don’t land on the island.
Once you have landed on the island, normal OB and mando rules apply: If you go OB you play from the last place the disc was in bounds (+ 1 penalty stroke). If you pass the mando incorrectly, you must take the shot again from the same lie (+ 1 penalty stroke).
Drop Zone: From the drop zone, if you pass the mandos incorrectly, you must throw again from the DZ (+ 1 penalty stroke). Normal OB rules apply.


If you go OB from the tee, proceed to the drop zone (+1 penalty)
